
Tile is designed to last for decades, but it is not entirely indestructible. Heavy dropped pots, settling foundations, and years of foot traffic can leave even the highest-quality surfaces looking damaged, dull, or dated. When your floor or shower begins to show its age, the immediate reaction is often to worry about the logistics and expense of a complete demolition and replacement. In the vast majority of cases, a full replacement is not only unnecessary, it is a financially draining mistake. This guide walks you through the diagnostic process of tile repair, helping you decide what you can fix yourself, when to call a professional, and how to save thousands by restoring your existing surfaces instead of tearing them out.
Understanding Tile Damage: Cosmetic or Structural?
Before attempting any repair, you must diagnose what caused the damage. Treating a structural problem with a cosmetic patch is a short-term band-aid that will inevitably fail. Look for these key indicators to determine how severe your tile issue really is.
- Cosmetic damage: small surface chips, light scratches on natural stone, minor grout staining, or a dull finish. These issues do not threaten the stability of the floor or wall system and typically come from accidental impacts, wrong cleaning products, or 5 to 15 years of wear.
- Structural damage: hairline cracks running continuously across multiple adjacent tiles, loose or hollow-sounding tiles when tapped, and crumbling or missing grout. Structural issues point to movement beneath the surface (shifting concrete subfloor, wood subfloor deflection, or a failing underlayment).
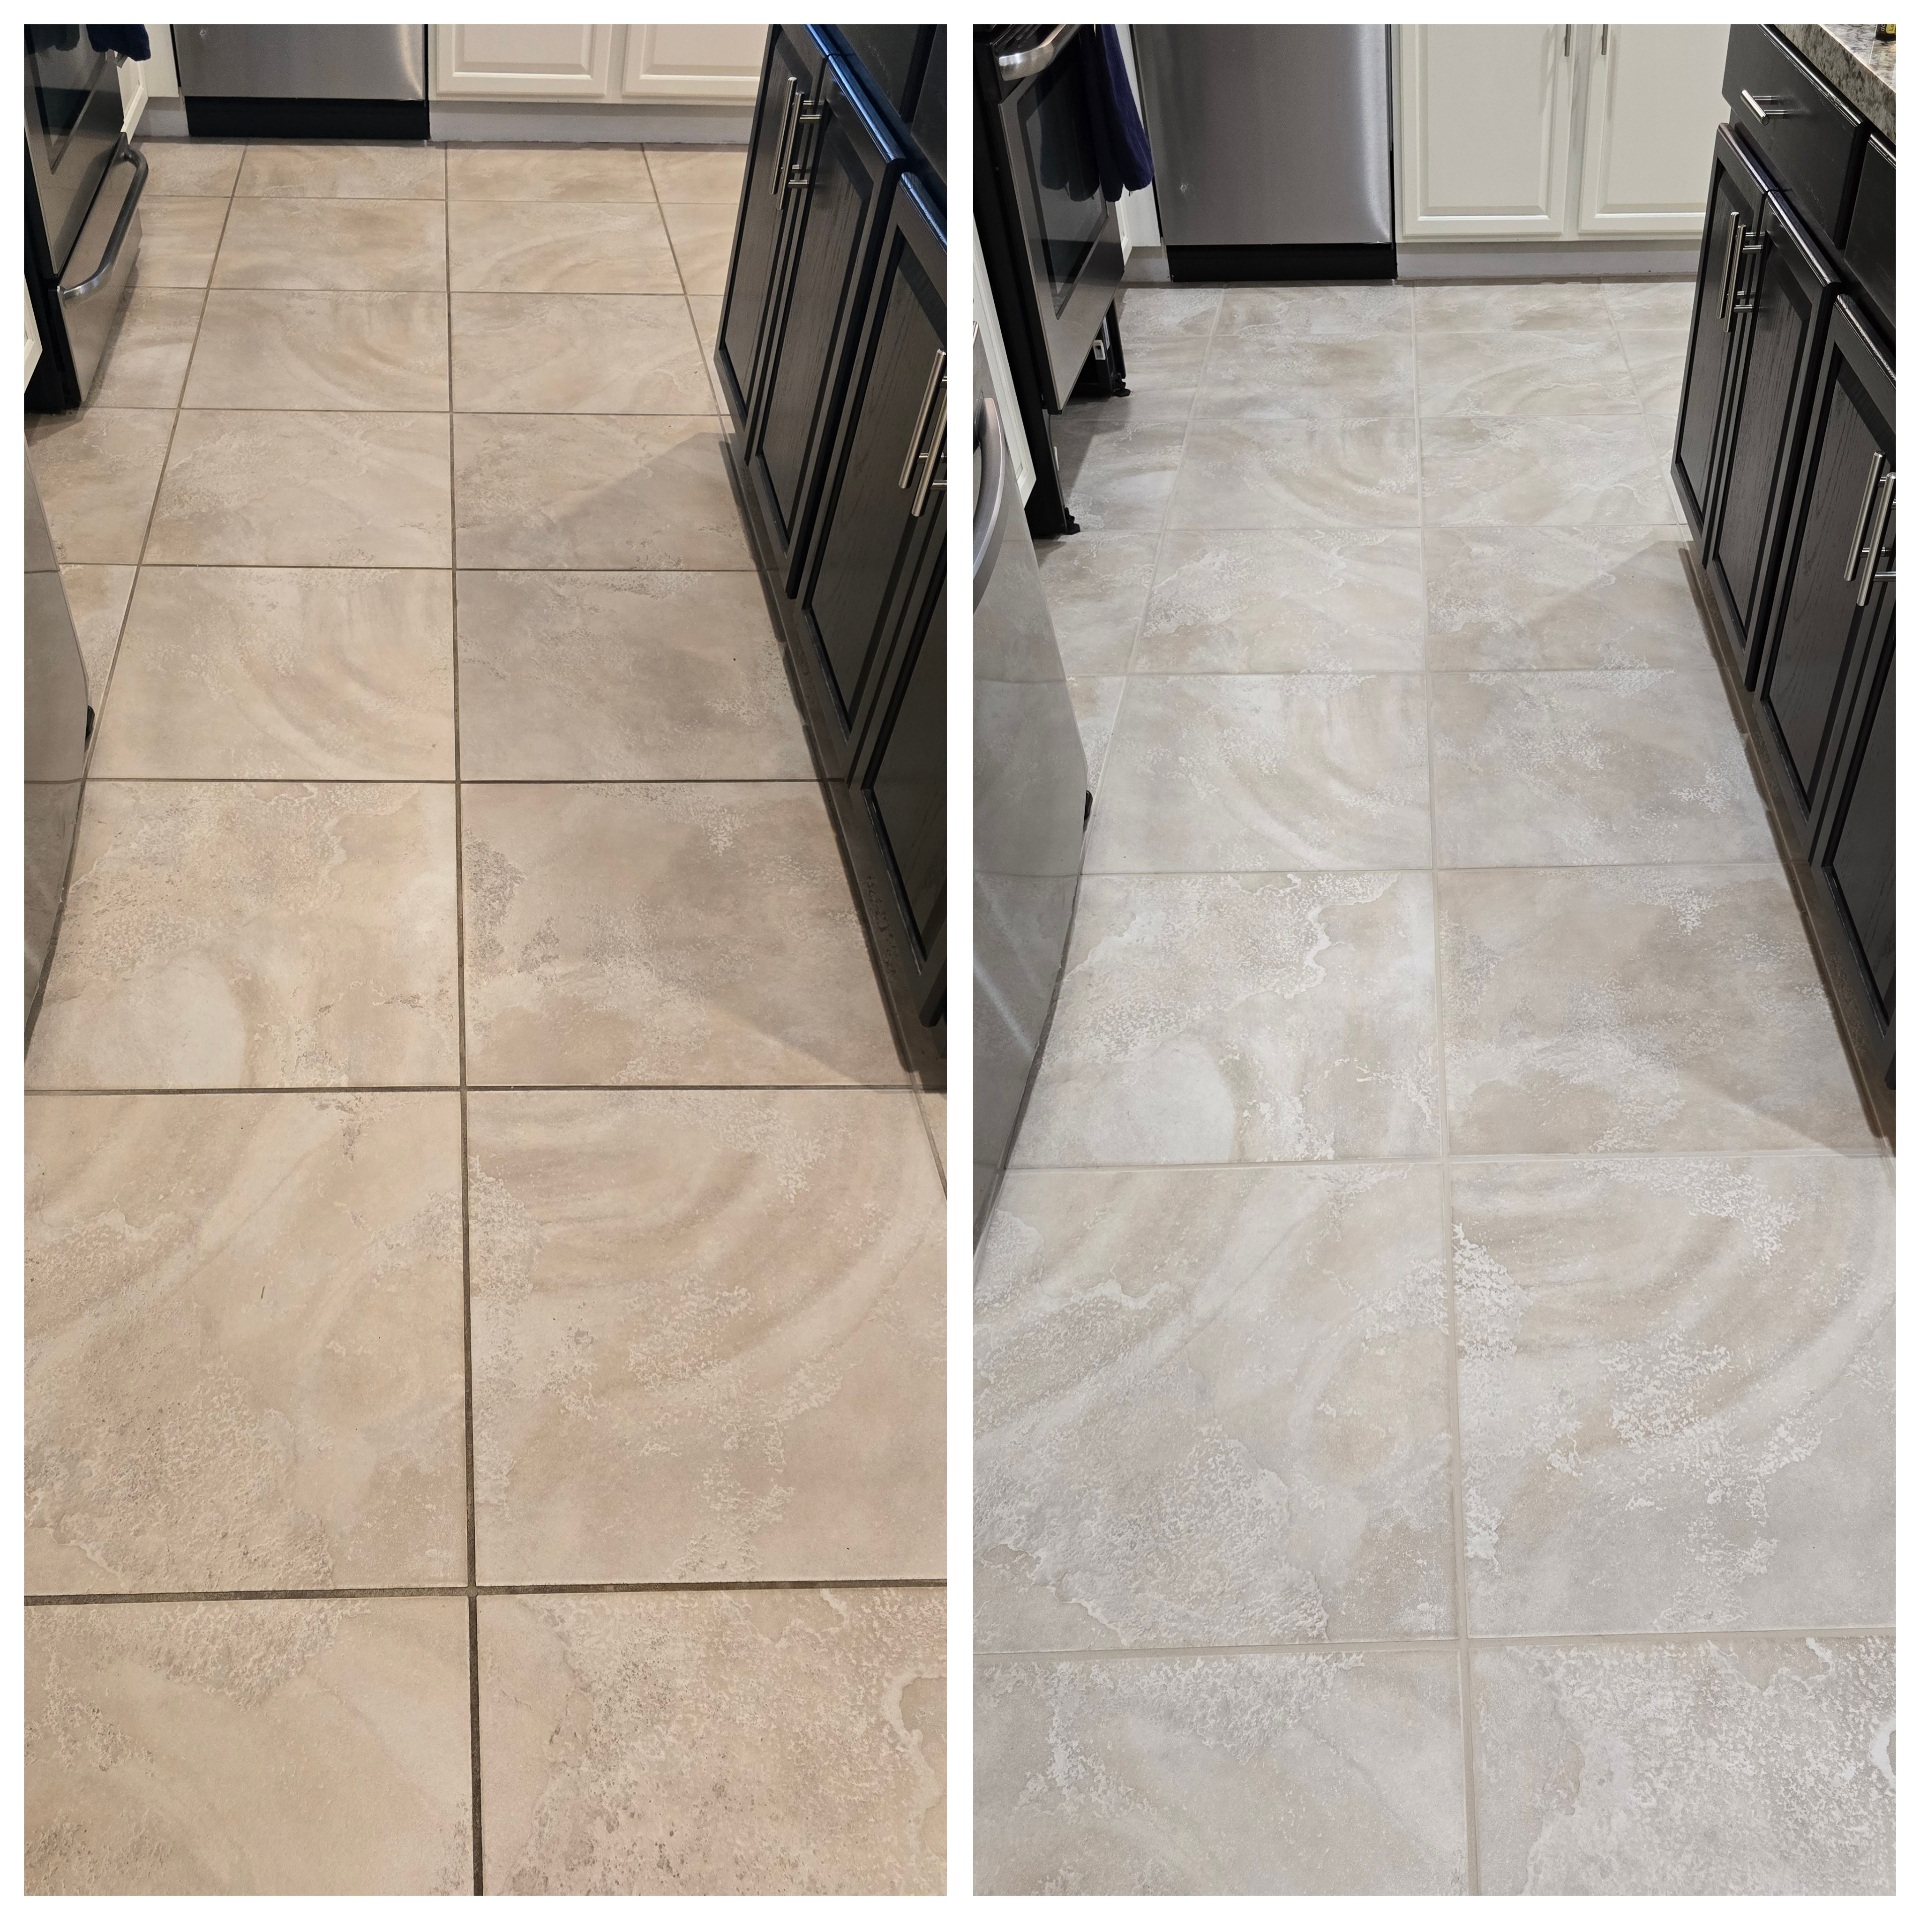
If your tiles are structurally sound but look worn, dirty, or chipped, restoration is almost always the most efficient and cost-effective path forward.
The DIY vs Professional Tile Repair Decision Matrix
Whether you should tackle a tile repair yourself or hire a specialist depends heavily on the tile material and the scale of the damage. Use this matrix as a starting point.
| Damage Type | DIY Feasibility | Recommended Solution | Potential Risks |
|---|---|---|---|
| Minor chip (ceramic/porcelain) | High | Retail epoxy or acrylic color-matched repair kit | Visible seam, poor color match if mixed wrong |
| Dull, scratched travertine or marble | Very Low | Professional dustless sanding and polishing | Irreversible etching, uneven finish, swirl marks from rental gear |
| Severely stained grout | Moderate | Deep scrub followed by a permanent grout color seal | Stripped grout integrity, inconsistent color, peeling sealant |
| Single cracked tile | Moderate | Chisel out and replace with a matching spare | Damaging adjacent tiles, cutting into waterproofing membrane |
| Multiple cracked or loose tiles | Low | Professional inspection, subfloor stabilization, replacement | Underlying structural issues remain unfixed, cracks return |
| Hard water scale (shower walls) | Moderate | Specialized heavy descaling treatment | Scratched tile, chemical burns from wrong acid usage |
When a DIY Retail Kit Actually Works
For a single, minor chip in a porcelain or ceramic tile (think dropped coffee mug in the kitchen), a DIY retail repair kit is a practical, cost-effective solution. These kits usually contain a colored acrylic or polyester resin, a hardener, and mixing spatulas.
- Clean the area thoroughly with isopropyl alcohol to remove grease, dirt, and moisture
- Mix the color to match the base of your tile, dabbing a secondary shade on top if your tile has variegation
- Apply the resin slightly higher than the surrounding tile, since it can shrink as it cures
- Scrape the patch level with a razor blade held at a 45-degree angle before it fully hardens
- Cure per the manufacturer's instructions, then lightly buff with the fine-grit sandpaper in the kit
DIY kits are for one isolated chip in glazed ceramic or porcelain. If you have more than two chips, any hollow-sounding tile nearby, or natural stone, stop and call a pro. You will spend less long term.
When Professional Restoration Is Required
While a DIY kit can resolve a minor blemish, professional help is required when the integrity of the installation is compromised or when you are working with delicate natural stone.
- You hear a hollow clack when stepping on tiles, meaning the thinset mortar has detached from the subfloor and the tile is unsupported
- Grout is actively crumbling or falling out, leaving wet areas exposed to moisture, wood rot, and mold
- Damage is widespread across natural stone floors and consumer-grade sanding would cause permanent etching
- Hairline cracks are propagating across multiple tiles, indicating subfloor movement or missing crack isolation membrane
- Hard water buildup is now bonded chemically to glass, porcelain, or stone and cannot be wiped off
Material-Specific Repair Pathways
Different tile materials require completely different restoration strategies. What works beautifully on a modern porcelain tile can permanently destroy a natural travertine floor.
Porcelain and Ceramic Tile Care
Porcelain and ceramic are highly durable, man-made materials. Because their surfaces are glazed (or in the case of through-body porcelain, highly dense and consistent throughout), they are resistant to most staining. When repairing these materials, the focus is on maintaining the integrity of the glaze and replacing individual broken tiles. Arizona homeowners frequently choose premium porcelain styles from regional suppliers like Arizona Tile. If you have leftover tiles from your original installation, a professional can surgically remove a single damaged tile and place a new one without disturbing the surrounding floor.
Travertine and Natural Stone Restoration
Natural stone such as travertine, marble, slate, and limestone is highly porous and chemically sensitive. Treat it wrong once and you can permanently dull a floor that has been beautiful for decades.
Never use vinegar, lemon juice, or any acid-based cleaner on travertine or natural stone. Vinegar causes irreversible chemical etching, eating away the calcium carbonate in the stone and leaving dull, rough, white marks that require professional mechanical diamond polishing to remove.
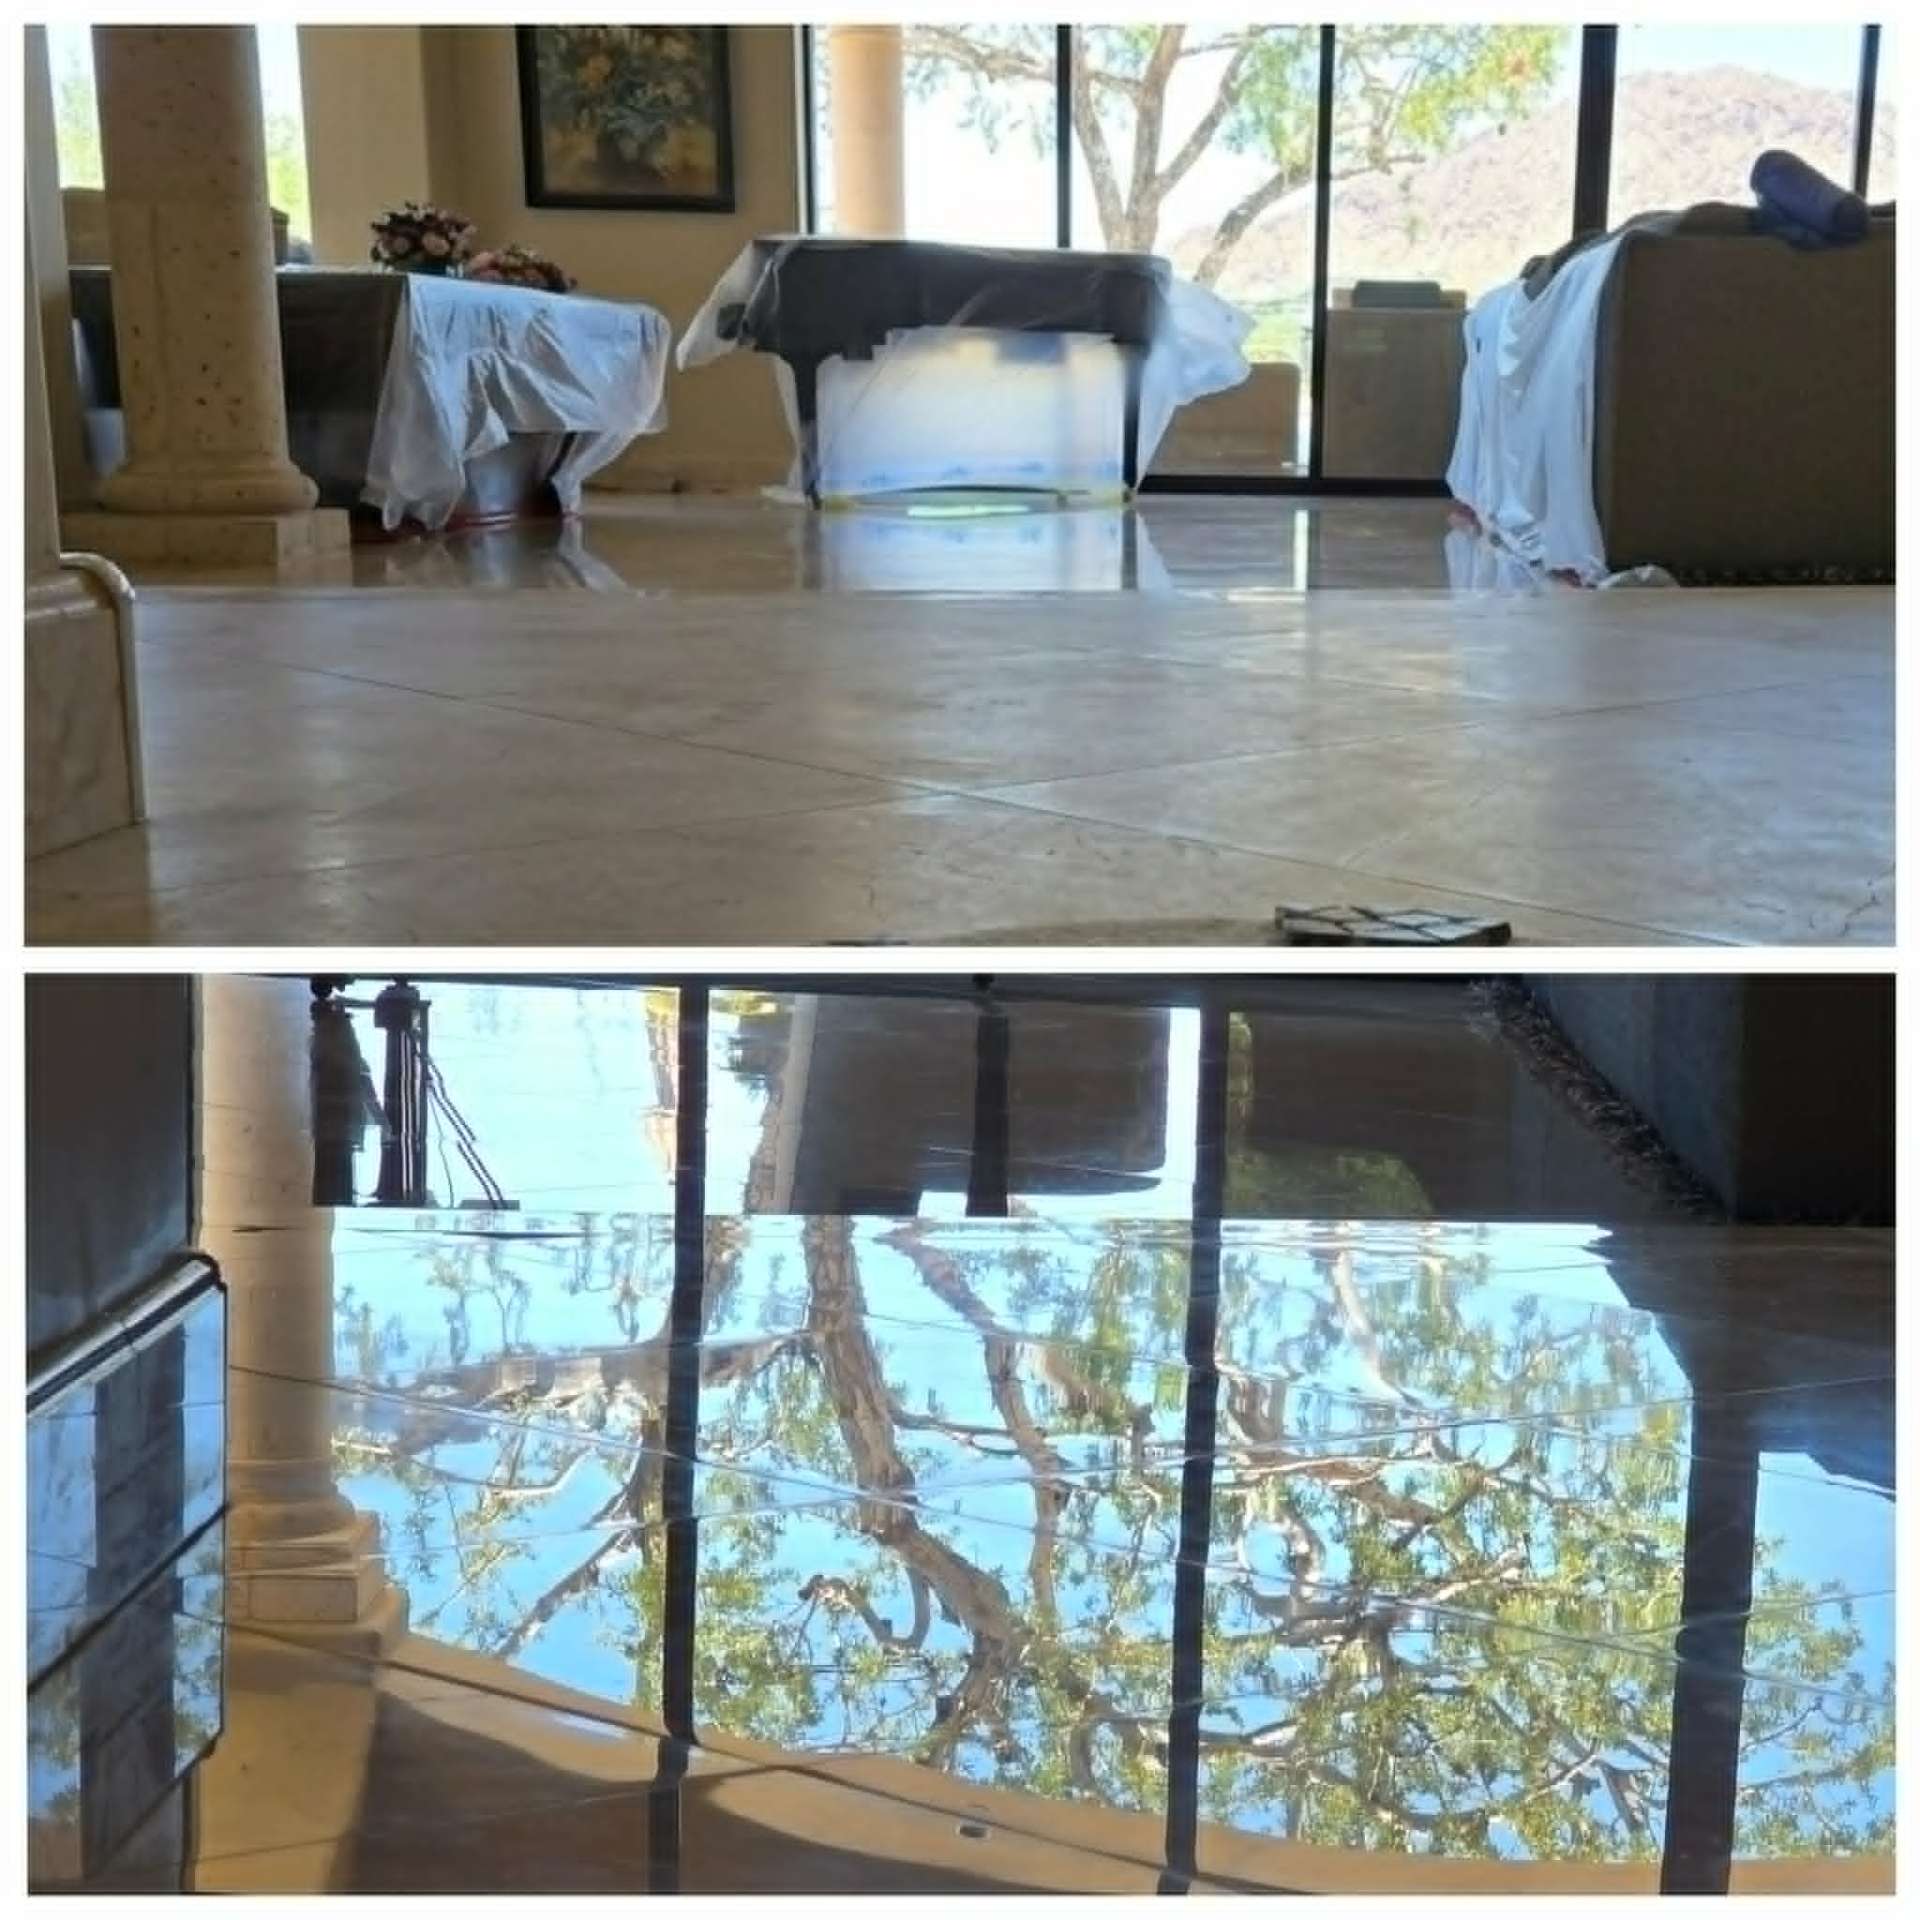
- Dustless sanding: weighted floor machines with diamond-impregnated pads and water wet-sand the stone, removing scratches without releasing silica dust into your home
- Hole filling: travertine naturally contains voids and pockets, and factory fills pop out over time. Pros fill these with color-matched polyester resins polished flat to blend seamlessly
- Polishing: the stone can be polished to a high-gloss mirror or honed to a classic soft matte finish based on your preference
- Impregnating sealing: natural stone is sealed with a penetrating sealer that sinks into the pores, repelling oil and water-based stains without changing slip resistance
The Economics of Tile Repair: Restoration vs Replacement
Before you commit to a full floor demolition, look at the real numbers. Many homeowners do not realize that the tile itself is only a fraction of the cost of a replacement project. A full tile replacement requires professional demolition and disposal of the old floor (massive dust and disruption), subfloor preparation with new backer board or uncoupling membrane, new tile and grout, professional installation labor, plus baseboard removal, painting, and reinstallation. The whole process can take one to two weeks and turn your home into a construction zone.
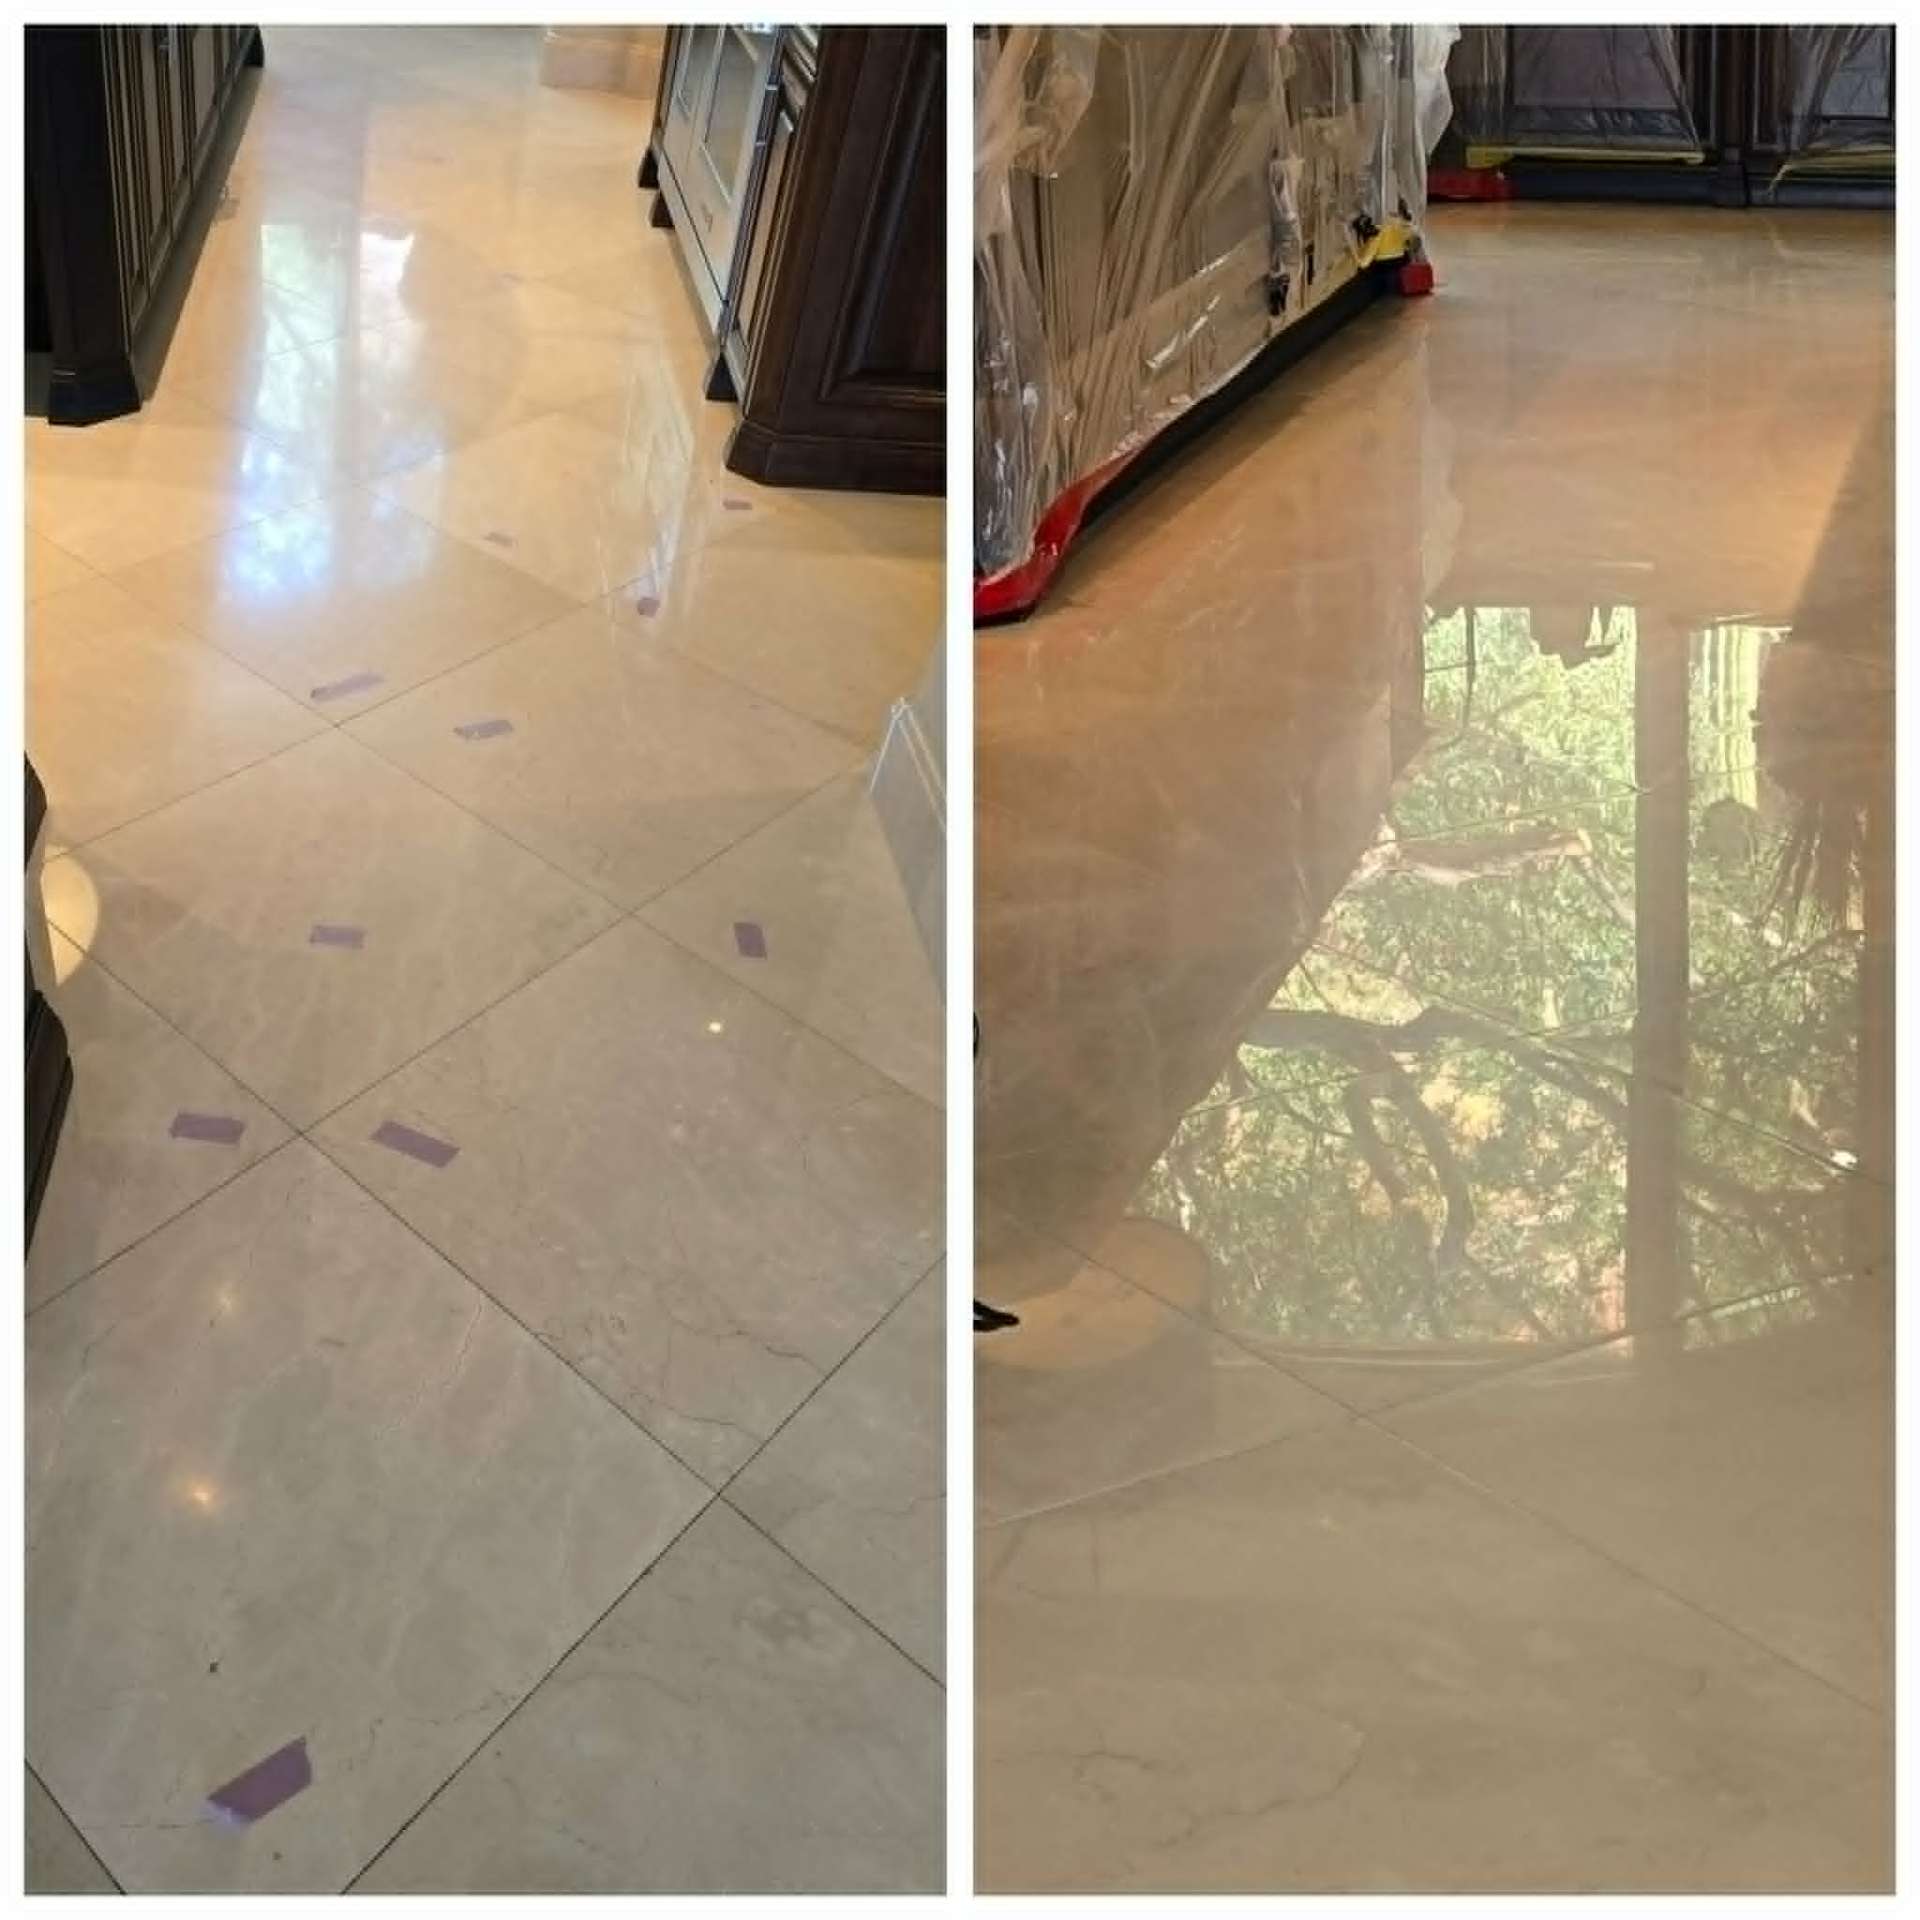
Professional restoration focuses on reviving what you already paid for. By deep cleaning the tile, polishing the stone, and applying a permanent grout color seal, you get a like-new finish in a fraction of the time and a fraction of the cost. Here is the comparison for a typical 2,000 square foot Arizona home.
| Project Scope | Average Cost Range | Time to Complete | Disruption | Warranty |
|---|---|---|---|---|
| Complete tile replacement | $18,000 to $35,000 | 7 to 14 days | High (dust, noise, displaced furniture) | Depends on installer skill |
| Professional restoration and color sealing | $3,000 to $5,000 | 1 to 2 days | Low (fully walkable within hours) | Up to 15-Year Warranty |
| Estimated savings | $15,000 to $30,000 | Saves 1 to 2 weeks |
Choosing professional restoration over replacement keeps thousands of pounds of tile out of landfills while putting a substantial saving back in your pocket.
Inside the Professional Restoration Process
Understanding the technical steps helps explain why restoration produces results household cleaners never can. The full process moves from deep pre-treatment through agitation, extraction, and finally color sealing and protection.
Step 1: Deep Pre-Treatment and Emulsification
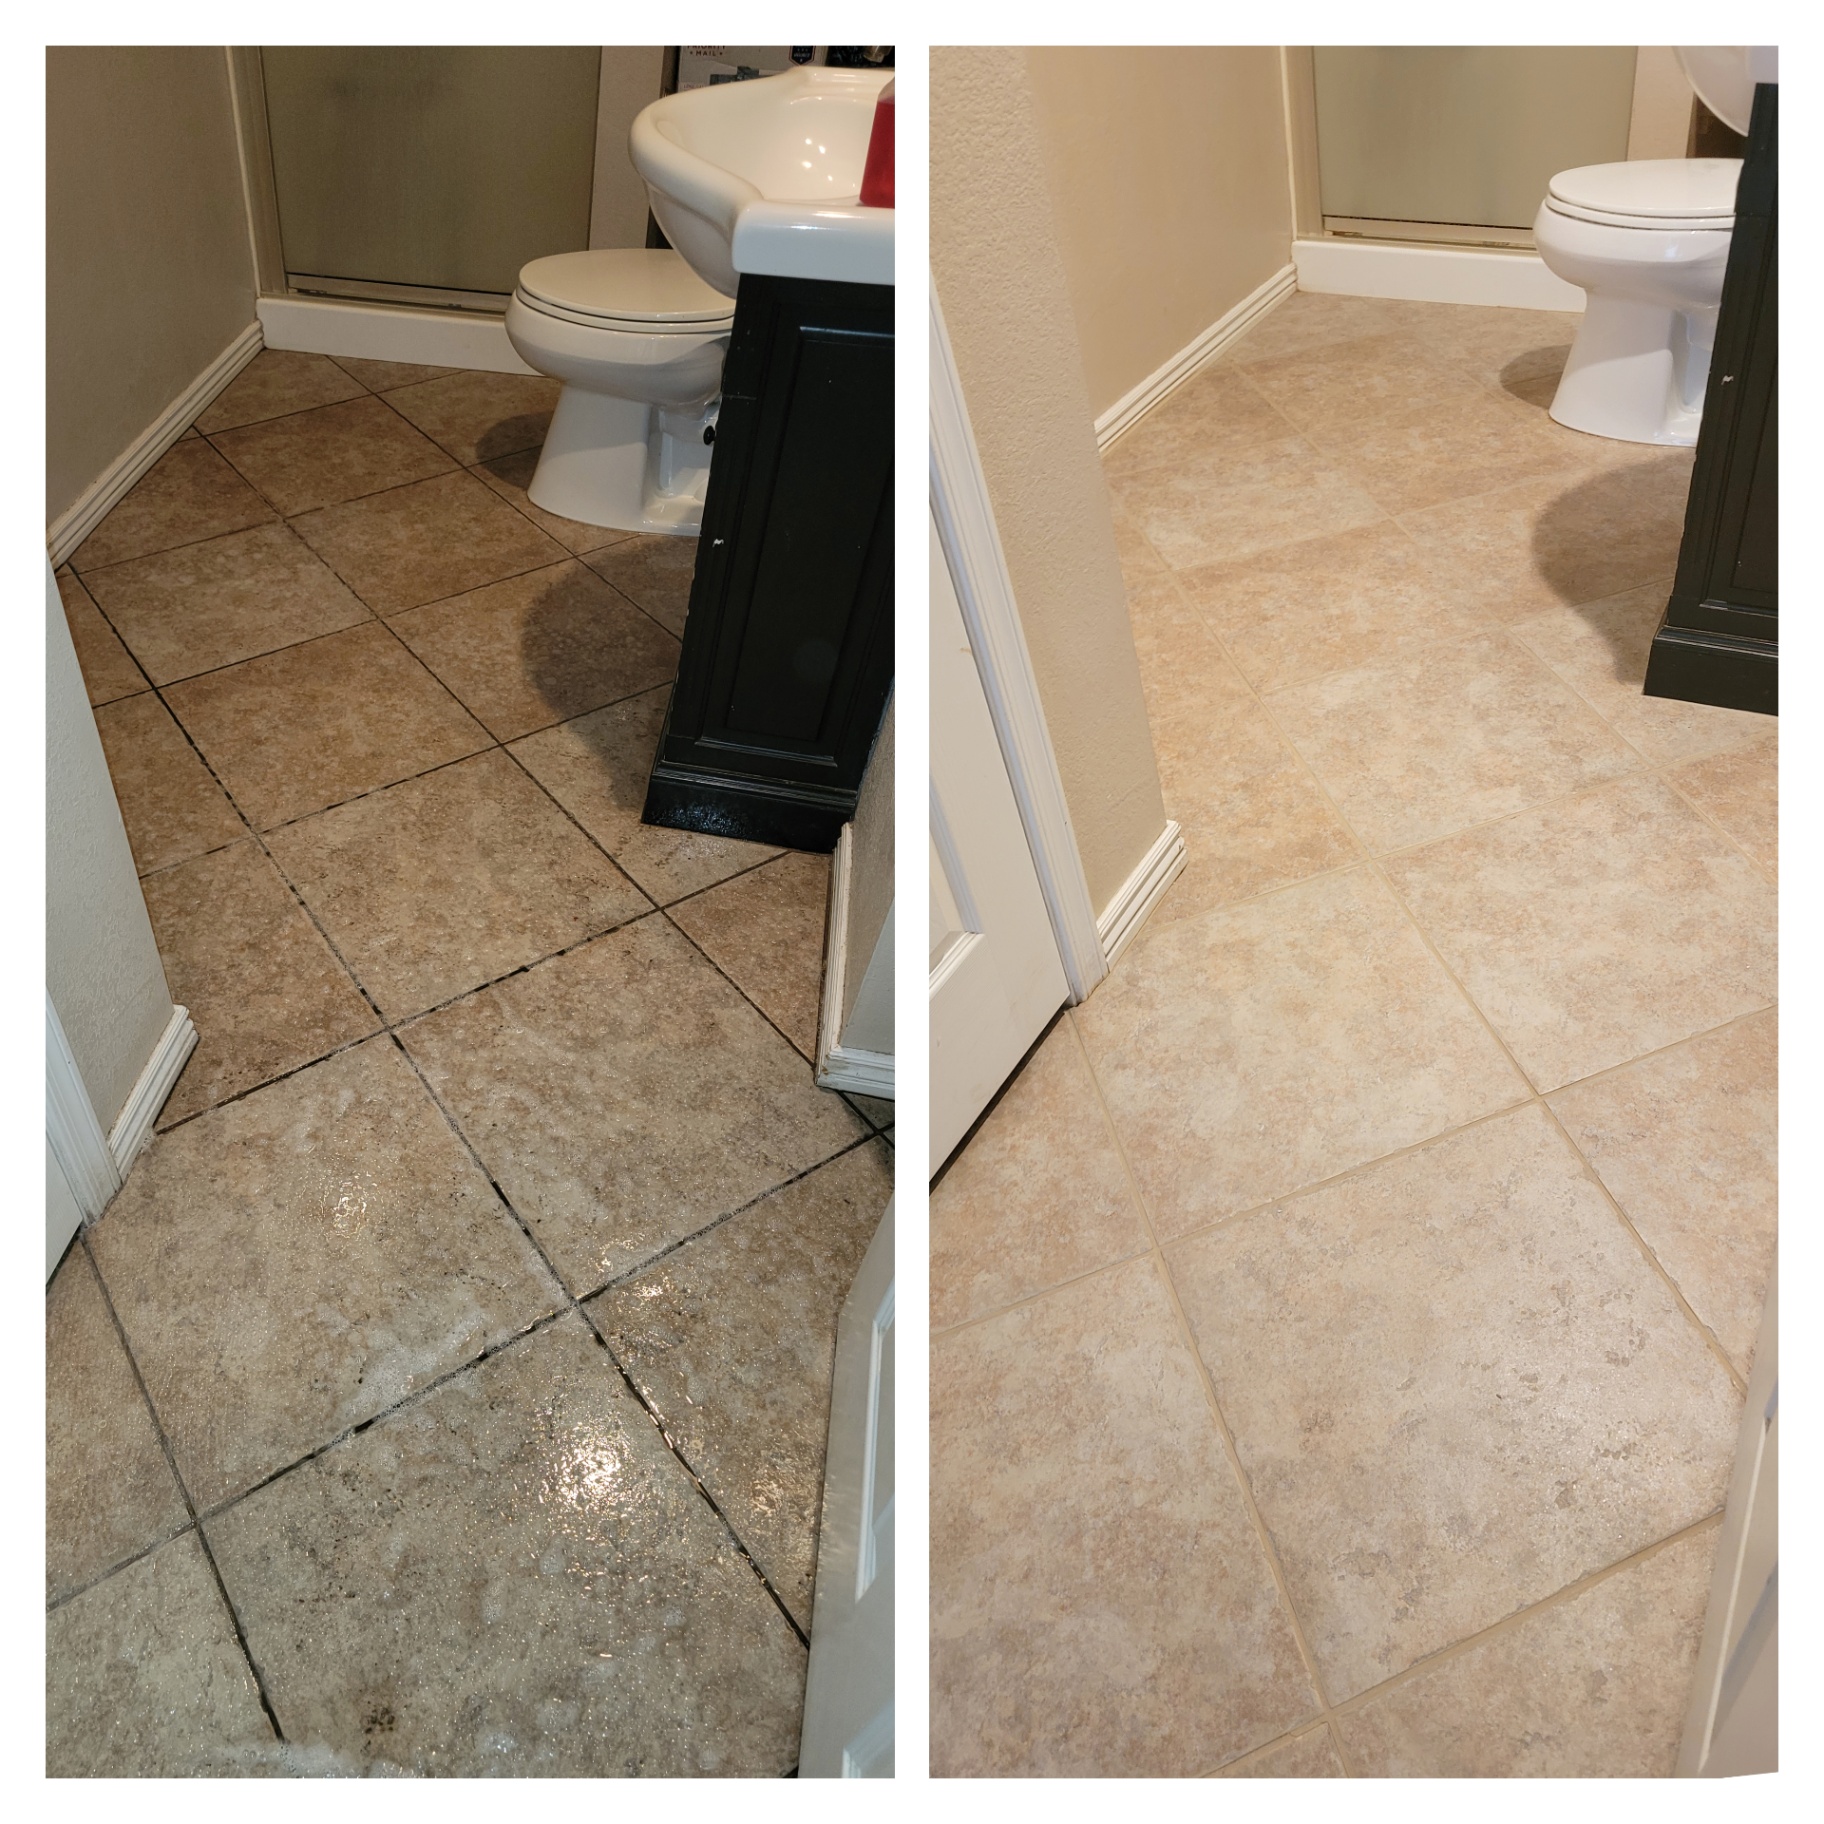
The process begins with a specialized alkaline-based cleaning solution. It breaks down body oils, pet dander, grease, and years of embedded soil that standard household mopping just pushes deeper into the porous grout lines.
Step 2: Mechanical Agitation
Counter-rotating brush (CRB) machines agitate the cleaning solution, physically loosening dirt from both the tile texture and the deep valleys of the grout, suspending the soil in the liquid solution.
Step 3: High-Pressure Hot Water Extraction
A self-contained, truck-mounted extraction system flushes the floor with pressurized hot water (typically over 200 degrees Fahrenheit) while simultaneously vacuuming up the dirty water. This instantly removes the suspended dirt and cleaning agents, leaving no sticky residue to attract future soil.
Step 4: Grout Color Sealing
Once the floor is clean and dry, a permanent grout color seal is applied. Unlike clear sealers that simply sit on top of dirt, a color seal penetrates and bonds to the grout, creating an impermeable barrier. It restores or changes the grout color to a uniform, clean appearance and guarantees that spills cannot soak in, making future maintenance as simple as damp mopping. Our color seal carries a 15-Year Warranty.
Arizona-Specific Tile Challenges
Homeowners in the Phoenix East Valley (Gilbert, Chandler, Mesa, Queen Creek) face specific environmental factors that accelerate tile and grout degradation.
- Extremely hard water scale: Arizona water has some of the highest mineral content in the nation. Hard water sprayed onto shower tile and countertops leaves stubborn calcium and magnesium deposits that bond chemically to porcelain, glass, and natural stone
- Soil expansion and shifting foundations: clay-heavy East Valley soil expands when wet and contracts when dry, causing seasonal home movement that shows up as hairline cracks in grout, loose tiles, and fractures across travertine or porcelain floors
- Dust and pet hair: our dry, windy desert means fine dust constantly settles indoors. Combined with pet hair, it acts as abrasive sandpaper underfoot, grinding down the polished finish of travertine and marble over time
How to Evaluate a Tile Restoration Specialist in Arizona
If you decide your tile floor, shower, or countertop needs professional care, choose a provider that understands the chemistry of different materials and uses industry-standard methods. Here is a transparent look at how regional companies approach tile and stone care in the Phoenix East Valley.
| Service Provider | Specialty | Certifications / Warranties | Key Distinctions |
|---|---|---|---|
| Lazona Tile Care | Complete tile, grout, and natural stone restoration | IICRC certified, 15-Year Warranty on grout color sealing | Permanent grout color sealing, dustless natural stone restoration, deep East Valley focus (Gilbert, Chandler, Mesa, Queen Creek) |
| Beyond Stone Solutions | Stone care and polishing | Varies by technician | Competent stone care option, no comparable East Valley color sealing warranty |
| Ari Stone | Stone restoration | Standard business licensing | Broad Arizona stone presence, less integration of porcelain tile and grout color seal systems |
| Stone Care of Arizona | Stone cleaning and sealing | Standard business licensing | Competent regional provider, less geared to suburban residential long-term warranties |
| Coconut Cleaners | General carpet and surface cleaning | Multi-surface cleaning focus | Great for basic surface cleaning, lacks specialized equipment for stone polishing or structural tile repair |
Questions to Ask Before Hiring a Restoration Specialist
- Are your technicians IICRC certified? The Institute of Inspection, Cleaning and Restoration Certification sets the gold standard. Certified techs understand the pH levels and chemical balances safe for each surface
- Do you offer a warranty on your grout sealing? A clear sealer wears off within a year. A premium color seal should carry a multi-year warranty. Lazona Tile Care backs permanent grout color sealing with a 15-Year Warranty
- What is your dust-containment protocol? For travertine or marble polishing, only a wet, dustless diamond system is acceptable. Dry sanding fills your home with silica dust and requires duct cleaning afterward
- Can I see a portfolio of past work? Reputable companies should easily share a gallery of local before-and-after projects covering shower descaling, travertine hole filling, and grout restoration
Bottom Line: Diagnose First, Then Decide
By taking the time to diagnose your tile damage and choosing restoration over premature demolition, you can revitalize your home's surfaces, protect your indoor air quality, and save thousands of dollars in the process. Not sure your shower qualifies? Review the shower restoration signs checklist first, then contact a restoration professional for a free assessment. Lazona Tile Care serves Chandler, Gilbert, Mesa, Queen Creek, Tempe, Scottsdale, and Paradise Valley. Call 480-352-0392 or book a consultation to get a clear answer before you spend a dollar on demolition.
Not sure whether your chip, crack, or hollow tile needs DIY repair or professional restoration? Upload 1–3 photos through our Free Damage Assessment and a Lazona specialist will send a personal video diagnosis with honest pricing within 24 hours.